Facades of buildings often contribute positive or negative effects on the structures interior. In this exploration a parametric facade is being looked at to see how the sun would affect it.
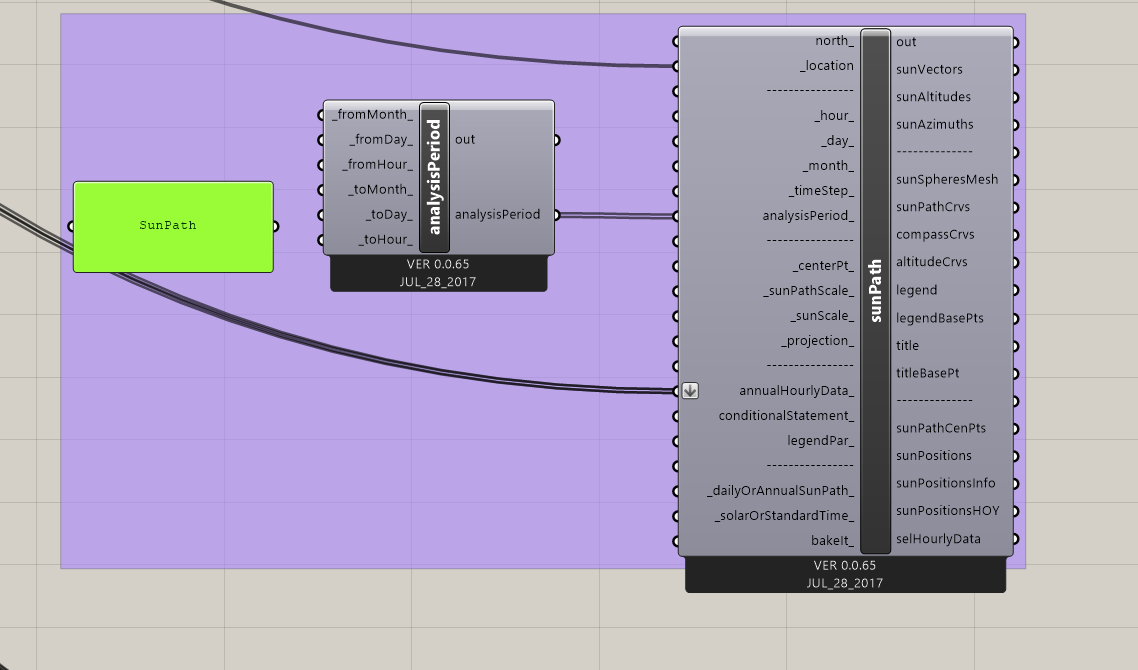
Step 1: Provide location of where building would be situated onto ladybug analysis. In this case, Brasilia, Brazil.
Step 2: Start seeing the type of analysis you would like to see. In this project radiation analysis, SunPath Analysis, and several psychrometric analysis will be taken.
Step 3:
Select Meshes you would like to run and simulation for every single analysis will start
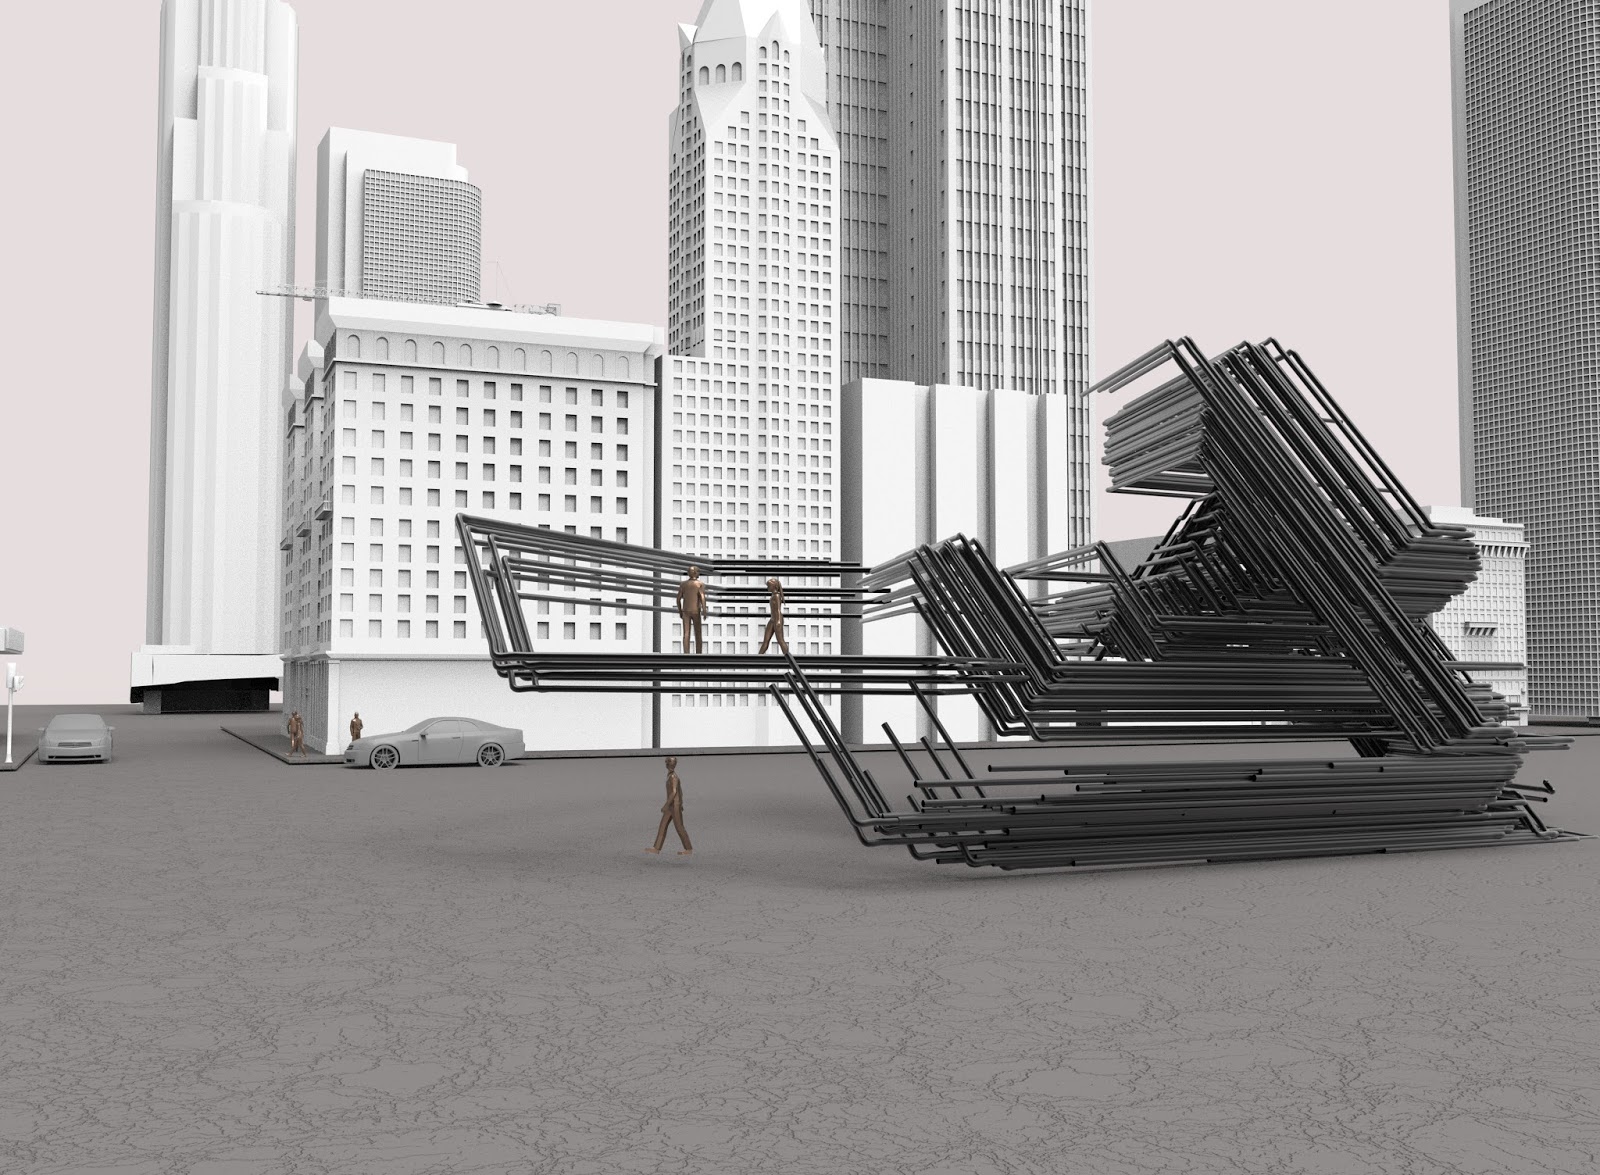
Gilles Retsin among many others has explored the utilization of discrete parts to mandate the entirety of the form. In Project 1, I will be exploring the designation of what the discrete could become, various iterations of the same grasshopper script allow for an unlimited exploration and designation. The following grasshopper definition was edited from a Michael Pryor "Discrete Vectors" example. I do not own the original example and only have used it for educational purposes.
Step 1:
Generate random points on a box for both a field location and a spin force location
Step 2:
Add planes to where spin forces are going to happen. Changing the settings on the numbers will drastically alter the end result. Play as you please!
Step 3:
The plugin Anemone has a loop battery that will allow the geometry to start being produced the longer repeat the longer the lines will keep on going. Keep in consideration that at some point the lines will be following its natural vector and go on forever. Limit at will!
Step 4:
Start adding the spin force batteries, these will direct the curves. Physics at its best!
Step 5:
This is where the discrete vectors plugin comes into play. No major visible changes will happen. The more resolution the more curvature the line work will happen and the less resolution the more vectors will happen.
Step 6:
The second part of the anemone loop setup is ended, a start loop must always be connected to the end loop. Curves are hidden in order to show geometry at next step.
Step 7:
Hide unnecessary stuff, and start generating the curvature based on the repeat function. Will show different time progressions.
Repeat at 10
Repeat at 50
Repeat at 100
Step 8:
For purpose of computer power I would not connect the next components, in my case I would bake the curves take into a different rhino file and start piping, but in better computer, plugging in curves to the following definition would work.